WebDAO - Java DAO based framework using JPA and Persistence Servlet

Java Persistence Architecture (JPA) is generally used in Java EE applications but can also be used directly in a Java SE program, see this article setting up JPA in a Java SE environment. However, you can get added advantages of running JPA in a web server environment and have your Java SE client programs access that, advantages such as:
- Better use of JPA connection pool and cache as these are shared amongst the clients
- Smaller client code without the need for full JPA and JPA implementation libraries
- Better security as clients don’t need to hold database login information
The problem is how to provide the access and still have pretty much the full functionality that JPA provides, this is where WebDAO comes in.
In a full blown java EE application access is not an issue as the user interface usually consist of generated or static HTML, CSS, and JavaScript files that are rendered in the user’s browser. The code that generates this user interface by whatever means (for example JSP, JSF) runs in the same java EE environment and so has direct access to the JPA entities, the JPA Entity Manager, along with other java EE goodies such as EJB, CDI etc.
In a Java SE desktop application, the user interface is most likely to be developed using Swing or JavaFX and not rendering HTML (unless perhaps it is a browser application written in java) and being able to query and persist entities directly in the client code is what is needed.
For example, in a Swing application you could getAll() Employee entities from the database and display them in a JList. If the toString() method of the Employee entity just shows the employee name then only names will be shown on the screen. The full details of the Employee could be obtained when the user makes a selection from this JList e.g.
Employee emp = (Employee) list.getSelectedValue();
With this selection you could then, for example, bring up a JDialog to show the employee details and let the user modify them and then use persistence to save the changes.
WebDAO allows you to directly query and persist entities within a Java SE environment by making use of the DAO design pattern with client side DAOs passing the persistence request via a Persistence Servlet on to the server side DAO which performs the persistence using JPA and returns results back to the client via the Servlet.
WebDAO Structure
Figure 1. shows the components making up WebDAO with those shown in green running on the client machine and those show in blue running on the web server.

Figure 1. WebDAO Components
Here is how it works:
-
First the Client Application calls a method on a Client DAO for example CharacterDao.getAll()
-
The Client DAO creates a PersistenceRequest which contains the Class name and Method name along with any parameters e.g. in this case the Class name is “CharacterDao” and the Method name is “getAll” and there are no parameters
-
The PersisteceRequest is passed to the sendRequest() method of the Persistence Interface which sets up an HTTP connection to the PersistenceServlet and sends it the PersistenceRequest object.
-
The PersistenceServlet receives the PersistenceRequest object from the client side and creates a new DAOProcessor instance to handle it.
-
A JpaDaoRequestProcessor instance (processor) handles the request and uses java Reflection to create an instance of the server side DAO and call the correct method, in this case CharacterDao.GetAll(). The processor also handles the situation when we are in an ongoing transaction by using the JPA EntityManager instance that has been stored in the HTTP Session otherwise it uses a new JPA EntityManager from the EntityManagerFactory.
-
The ServerDao (CharacterDao.GetAll()) uses JPA to query the database and return a list of Character entities. This is then passed back along the call chain via the PersistenceServlet back to the client PersistenceInterface.SendRequest method and on to the Client Application.
This may seem like a lot of effort but all the client has done has invoked one line of code (characterDao.getAll()) to receive all the Character rows from the database as a list of Character entities and once the framework is in place all we are doing is creating new JPA Entity and DAO classes as required.
The WebDAO code
WebDAO is on GitHub and the repository can be downloaded from here. It requires java 7 and Netbeans with Apache Tomcat, I am using Netbeans 8.0.1 with Apache Tomcat 8 which can be downloaded from here (choose the “All” bundle). There are three projects to load up into Netbeans and once loaded they should looks like this:
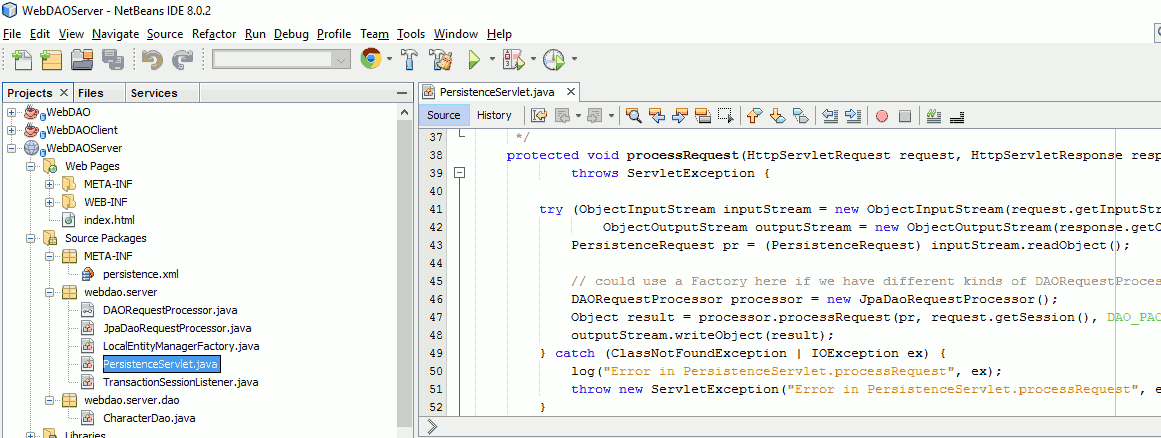
The WebDAOServer project contains the server side code and is set up to use JPA accessing the H2 java JDBC database in “in-memory” mode. The persistence.xml file that is used to configure JPA is held in the META-INF directory and contains the following:

Note that the entities are defined in the persistence unit WebDAOPU and for this example there is only one entity the webdao.entity.Character class. Also note that I am using the EclipseLink JPA implementation and asking EclipseLink to automatically create the tables if they do not exist. In this case, there will only be one table created which will match the definition in my Character class.
To use a different database such as Oracle or MySQL you would just have to modify the persistence.xml file and replace the H2 database driver with the appropriate database driver in the project library.
The WebDAO project contains the common classes used by both the client and server and this is where the JPA entity classes are defined. In this example I am only using the Character entity to represent cartoon characters this is the listing:
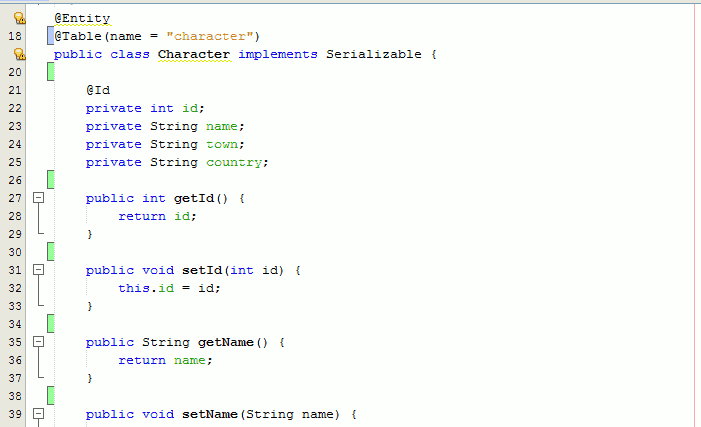
This is defined in the package webdao.entity and this is where you would create any new entity classes to suit your needs. Note this is a POJO (Plain Old Java Object) class and is annotated with JPA annotations to map to the table in the database. The class implements the Serializable interface, this is required as java serialization is being used to pass the entity objects between the client and server.
The server side DAOs are defined in the WebDAOServer project in the webdao.server.dao package in the sample code it just contains the CharacterDao class to provide methods to query and persist Character entities:
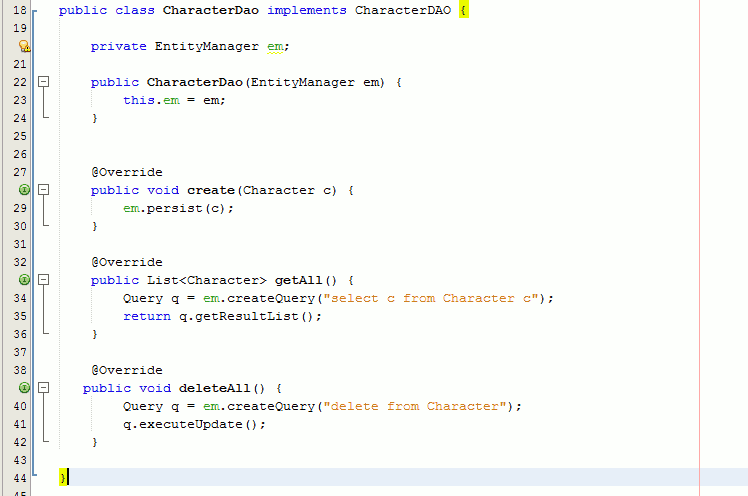
Note the simplicity of the the JPA query language JPQL obtain the list of character objects in getAll() and to delete all character objects in deleteAll(). As you can the class is also seeded with the EntityManager instance through the constructor.
To provide the necessary access on the client side an equivalent DAO class is set up in the WebDAOClient project:
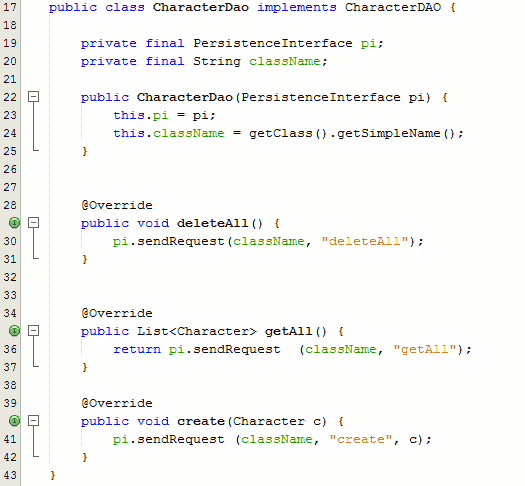
Note also the simplicity of this code which is pretty much “boilerplate” code and that it is injected with the PersistenceInterface object pi via the constructor. The methods are implemented as simple calls to overloaded versions on the sendRequest method passing the className, method name and any parameters. Also note that for completeness both the client and server versions of CharacterDao implement the interface CharacterDAO (sorry couldn’t think of a better naming convention) and that the CharacterDAO interface resides in the common project WebDao. It is not entirely necessary for the extra interface class as an error would be returned when calling the client DAO method if the matching DAO class and method does not exist on the server. However, using an interface could be useful for testing client code for example with a mock implementation of the DAO without having to have the server side code in place or also on the server side using a mock version that does not actually access the database and returns know results.
Running the example code
First you need to run WebDAOServer by right clicking on the project and selecting “Run”
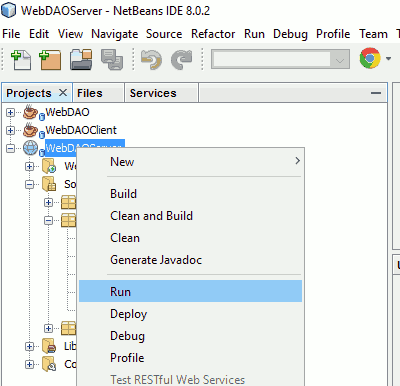
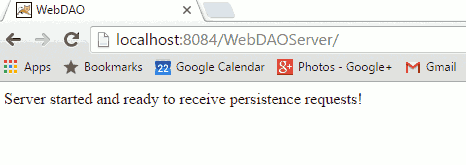
This will start up the Tomcat server and deploy and run the project which will display the index.html web page in your browser once up and running:
Now you should be able to run the client test code class TestWebDao in the WebDAOClient project which looks like this:
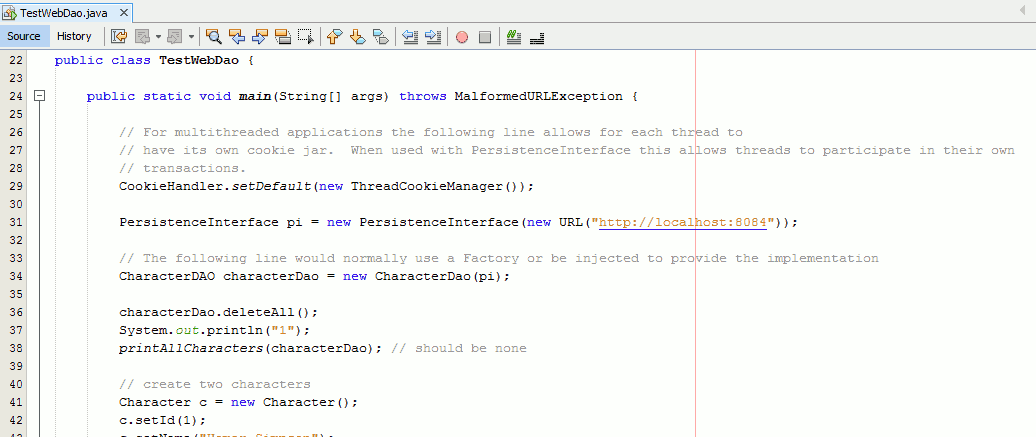
But first you may have to change the port number on line 31 to match what port you have your Tomcat server set to. On running this class, the output should be as follows:
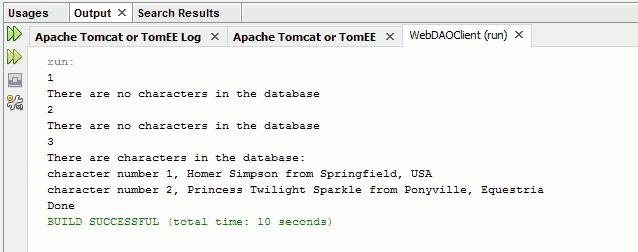
On first run this takes a while to run as the H2 database running on the server is having to create the in memory database and the Character table, subsequent runs should be a lot faster. Check the code to see what it is doing but basically the Character table is for cartoon characters and at step 1 it has just run characterDao.deleteAll() so there should be no characters in the database. At step 2 it is showing that the transaction has been successfully rolled back as it has created the two characters within a beginTransaction() and a rollbackTransaction(). Note that if no beginTransaction() is called before a create update or delete operation (i.e. there is no on-going transaction) then the single operation is automatically wrapped in a transaction and committed (as in the deleteAll() of step 1). In step 3 we do the same as step 2 but this time commit the transaction and as expected on querying the database we have the 2 character records.
By the way my daughter chose the cartoon characters for me… I am not really that into My Little Pony!
My next step, to make this sample a bit more realistic, is to include a Cartoon entity then I can set up one to many and many to one relationships between the Cartoon and Character entities. This is standard stuff in JPA so should not be difficult. But that is another day!
About Author:
Chris Whiteley - github.com/Chris-Whiteley